Creating an Azure Service Bus instance
Using Message Broker technology can enable a lot of features and abilities in your applications. Patterns like Asynchronous Communication and Publish/Subscribe can deliver a lot of benefits as build our systems and integrate with different services and components.
In order to get started with these approaches, you need to have a way of testing things out and exploring the underlying technologies. Message Brokers can be complicated to setup and getting functional, so a simple one you can start learning with is Azure Service Bus.
If you have ever used Azure and its portal, Azure Service Bus is a pretty simple PaaS service to turn on and start using. There isn’t a fully functional version of Service Bus that doesnt have a cost associated with it, but it is a relatively low cost to operate one. If you have an MSDN subscription, it will easily fit inside your credits. If you’re paying with your credit card, then running a Standard tier Service for a month will cost you about $10 a month.
Creating a Service Bus Instance
First things first, you need to create a Service Bus. You can search the Marketplace on the Azure Portal for ‘service bus’, and you’ll find this:

Hitting create gets you to a screen where you enter the Service Bus Namespace. This the globally unique name for your Service Bus instance. The form will validate it’s uniqueness for you live. This forms part of the URL for your service bus.
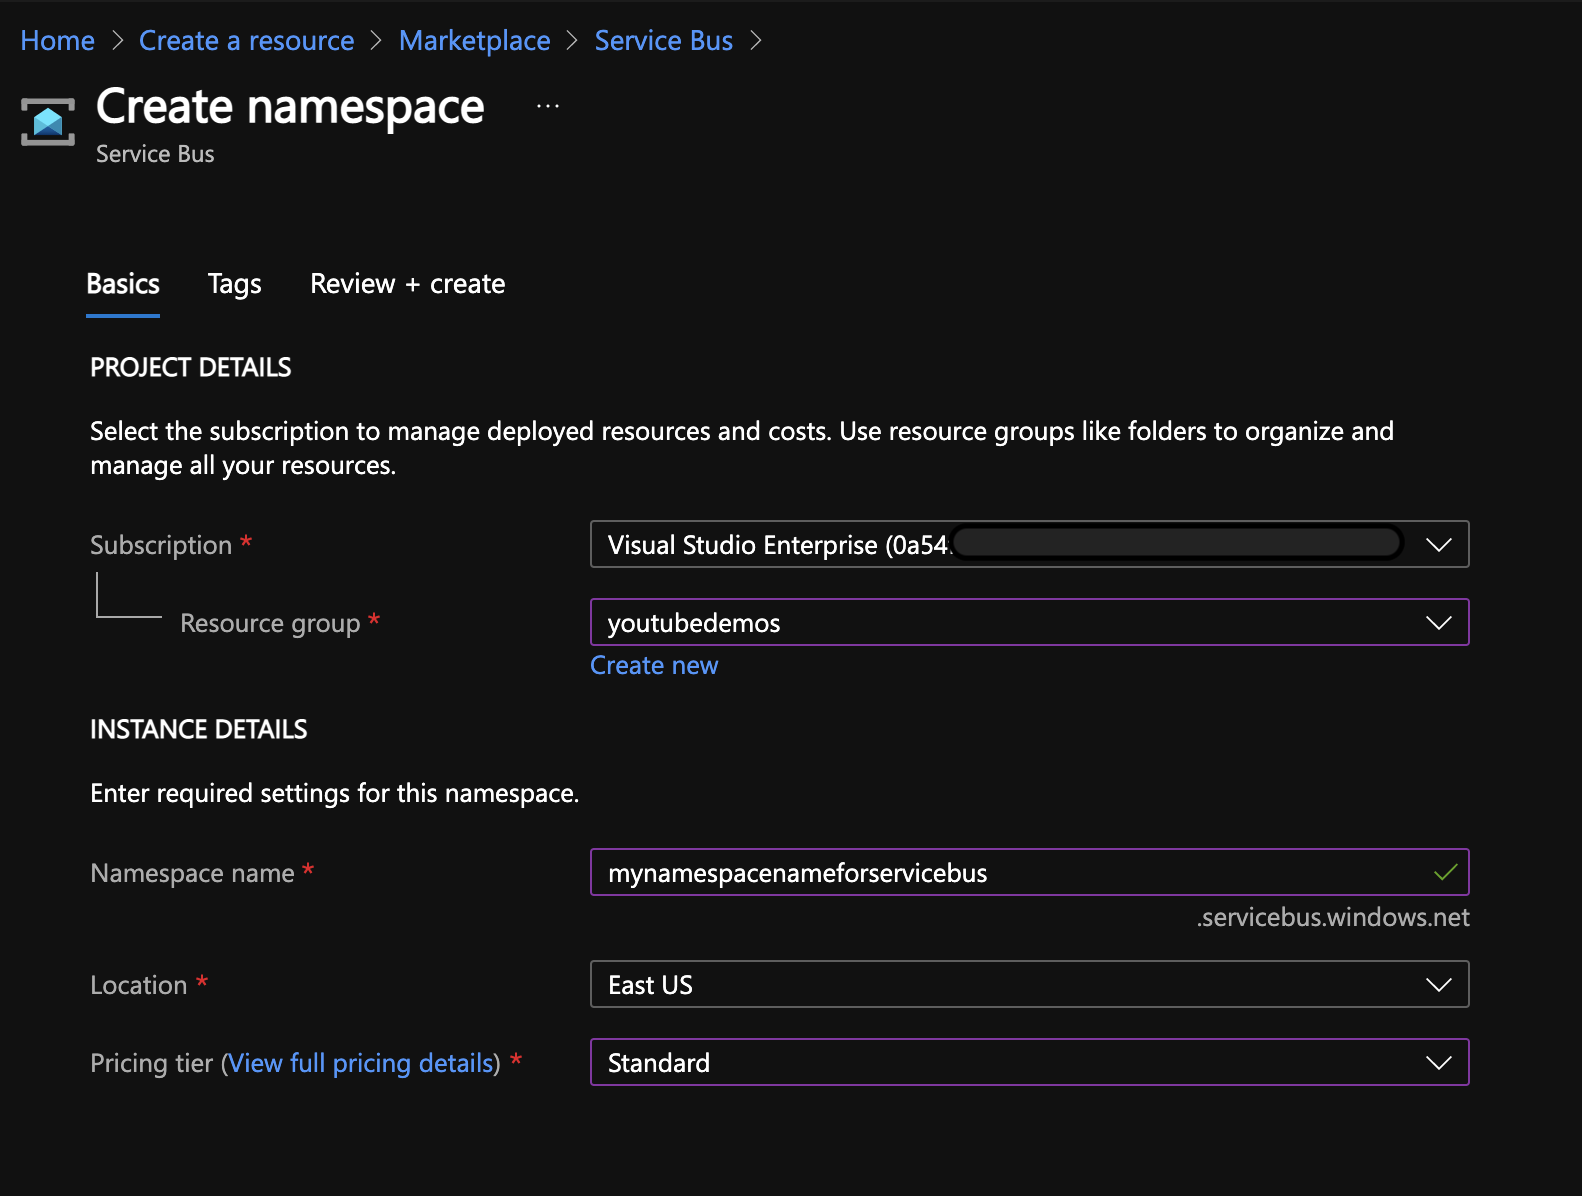
Hitting the Create button now will tell Azure to setup a Service Bus instance for you. The process takes just a minute or so.
Creating a Queue
Once your Service Bus has been created, creating a Queue is a pretty simple process. Navigate to your Service Bus in the portal, and on the left hand side menu of the service bus page is a section for Entities.
Under Entities, click Queues. This will give you a list of all the Queues setup on your Service Bus which, if you just made it, will be none.
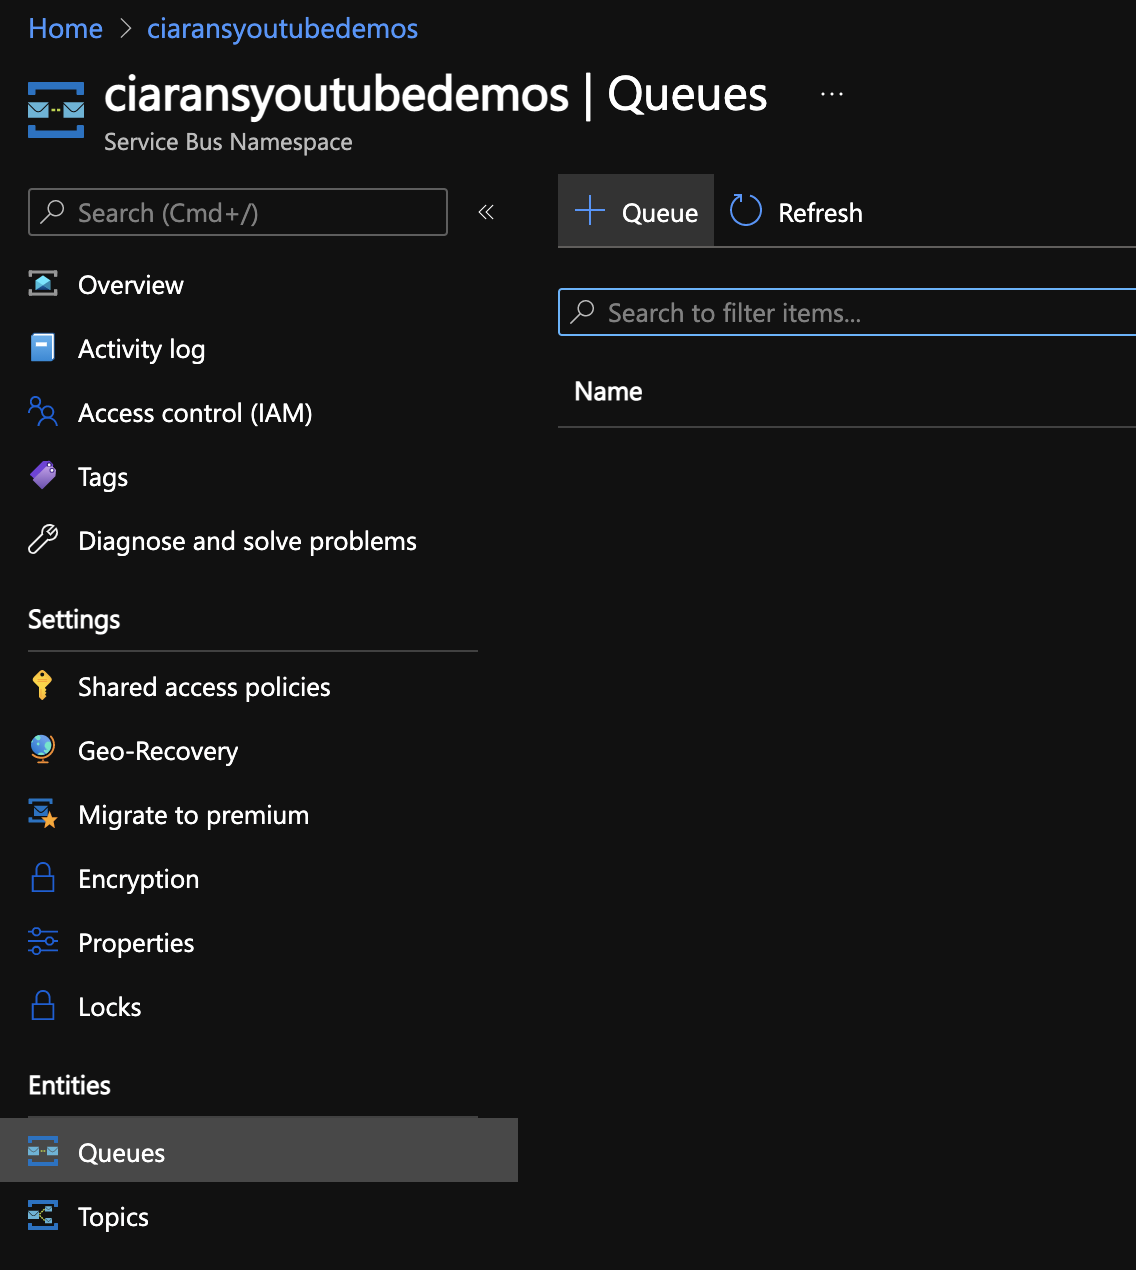
Hit the button ‘+ Queue’ and you’ll get a flyout page for the Queue information you need to enter.
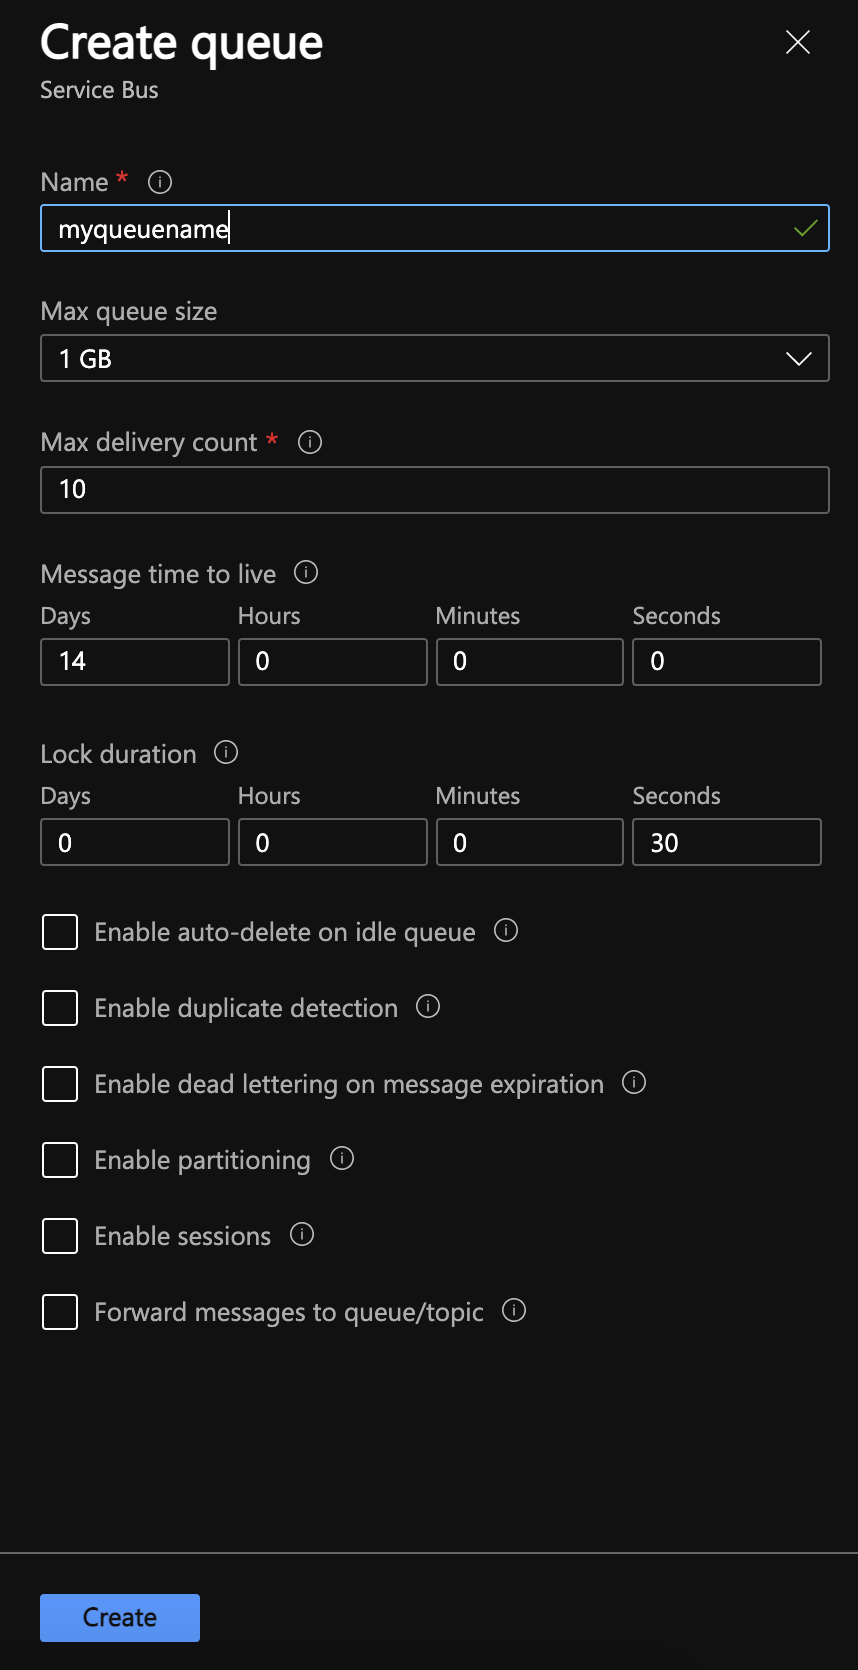
Everything here except the Name will be set to default values. This is just the Queue name and will need to be unique just for your Service Bus Namespace.
If you don’t know what the rest of the options are at the moment, you can leave them as the default for now and we’ll cover those in future posts.
Once you hit the Create button, the Queue will be made and ready in just a few seconds.
Creating a Topic and Subscription
This is similar to creating a Queue, but you hit the Topic option under Entities. Again as your namespace is new, there wont be any. Just hit the ‘+ Topic’ button to add a Topic

This panel has less options that the Queue one, this is because Topics dont have settings for message receiving, just for sending.
Once you have Created the topic and look at its page, you will see there is another Entities section with Subscriptions in.
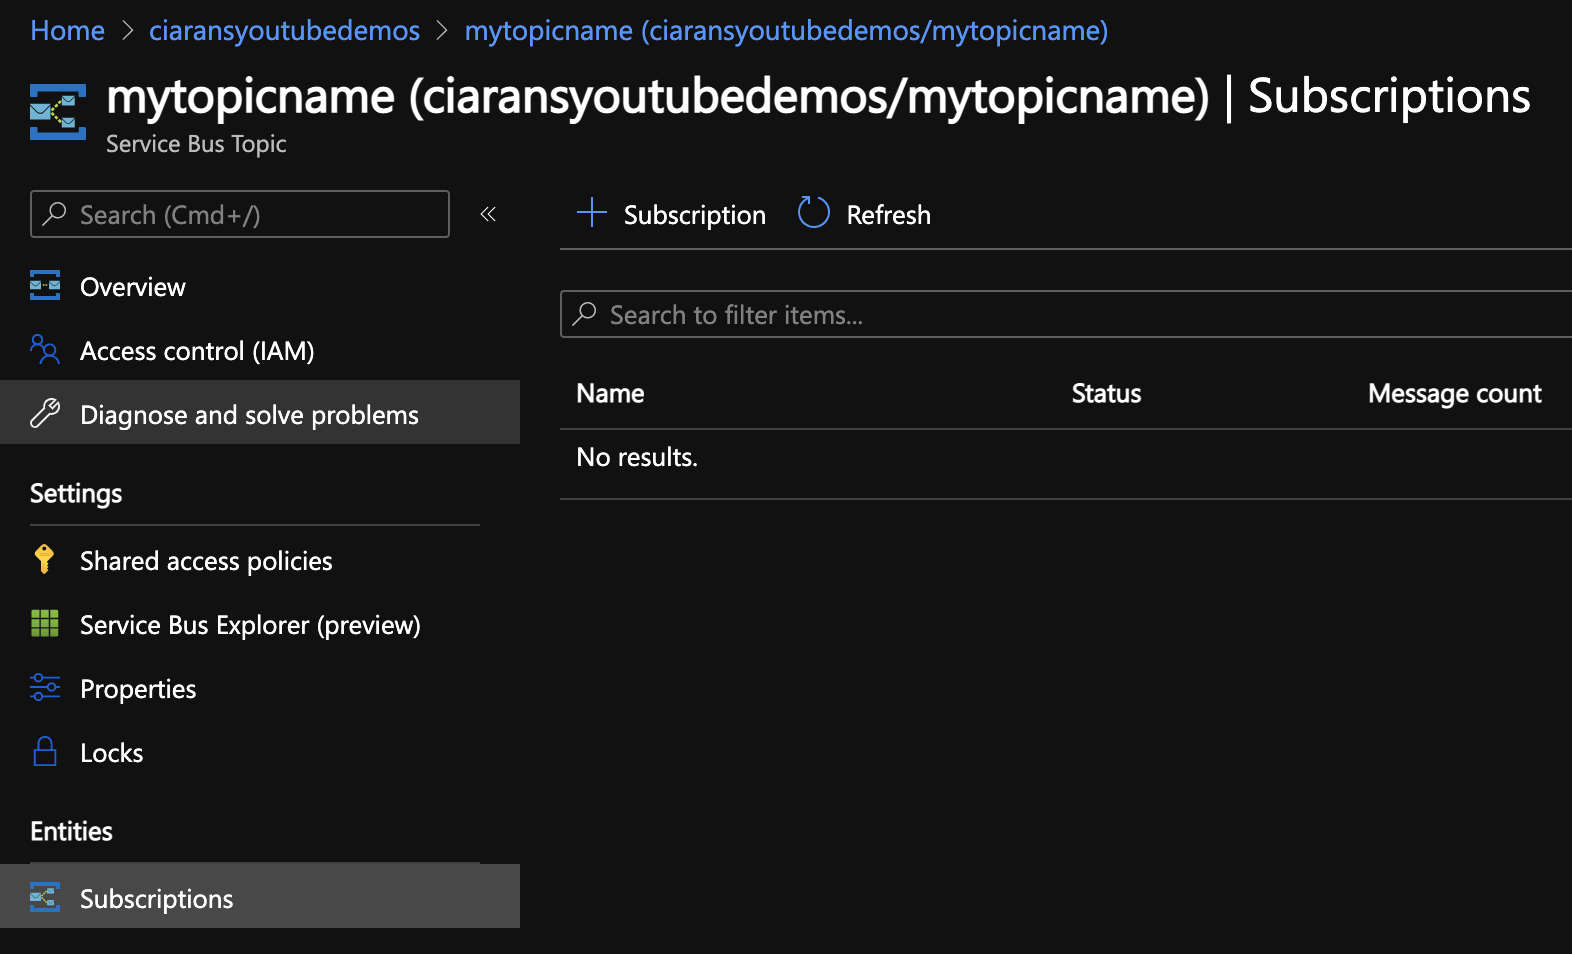
Clicking on that will give you the list of Subscriptions on the Topic. There won’t be any on your new Topic so hit the ‘+ Subscription’ button. Then you’ll get the Create Subscription flyout
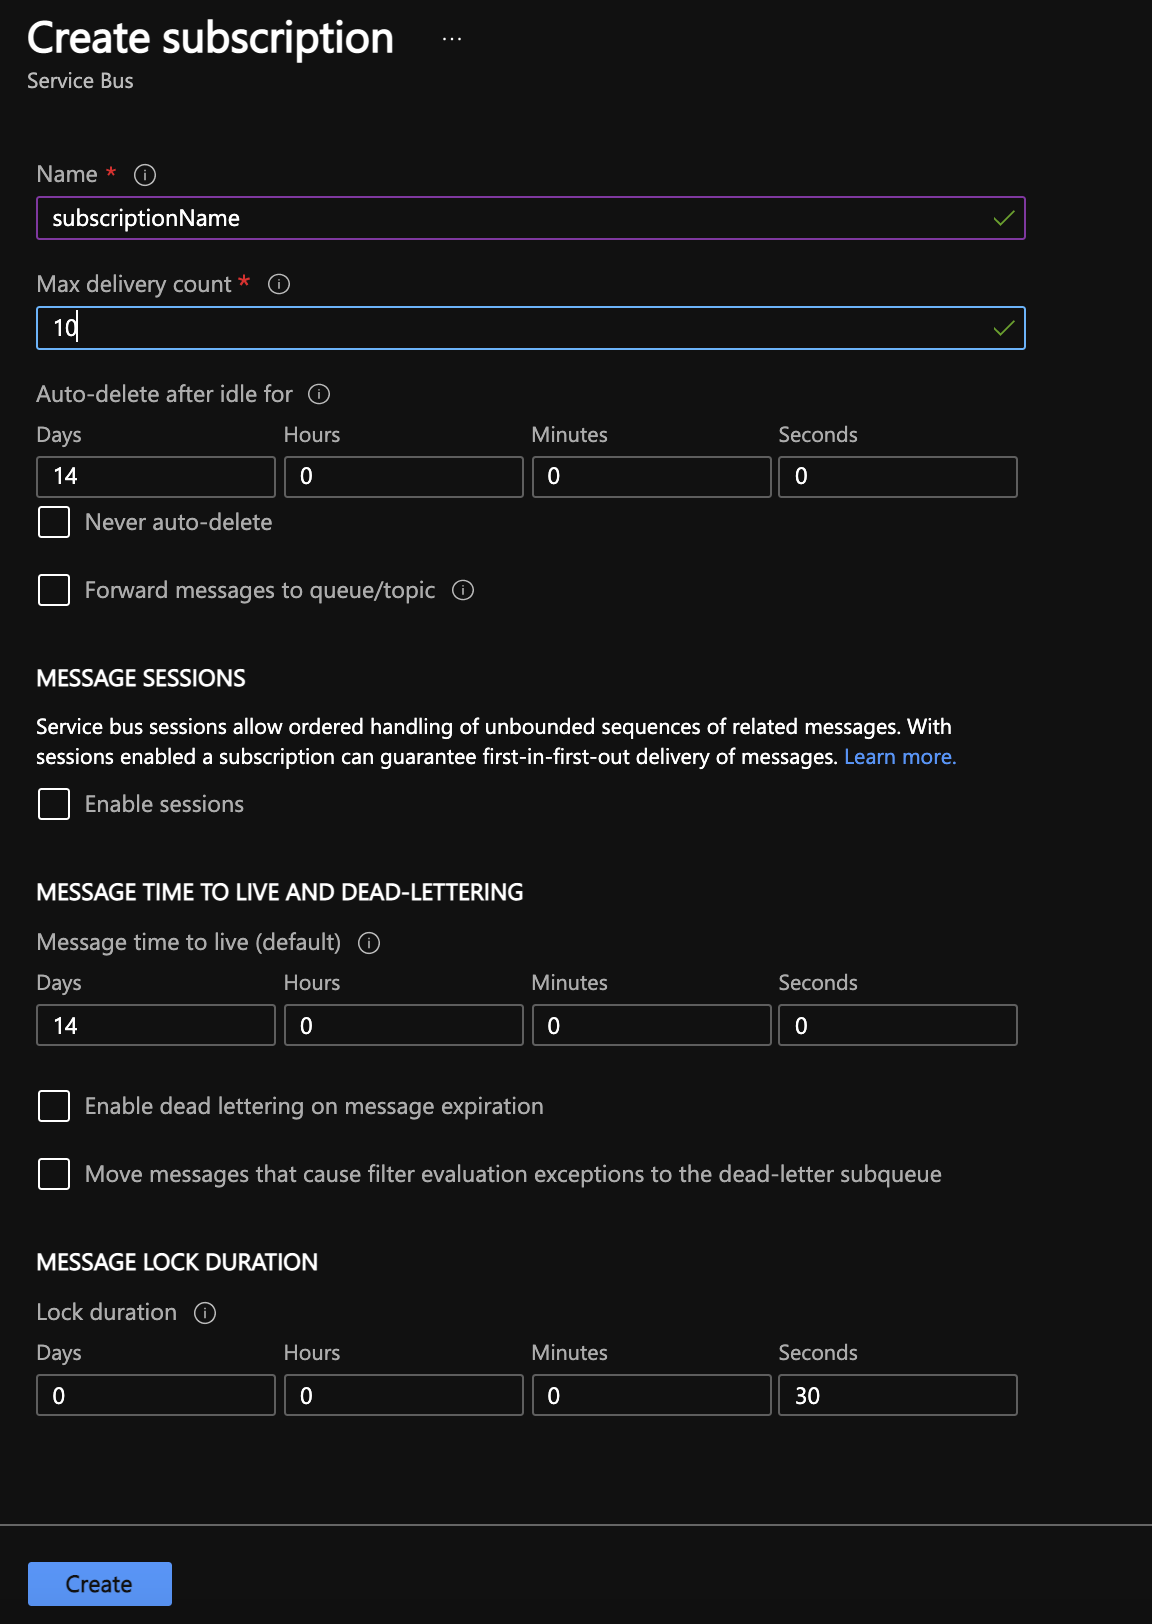
Here you will get similar options to the Queue page about receiving messages. You’ll need to enter the Subscriptions Name, which needs to be unique for the Topic its in.
You may also have to enter the Max Delivery Count. This is the maximum number of times Service Bus will deliver a message to the subscriber without them processing it successfully. So setting it to 10 means you will get 10 chances to process a message, and if you dont succeed it will be moved to the Dead Letter Queue for that subscription.
Connecting to the Service Bus with code
In order to connect to the Service Bus from an application we’ll need a connection string. The connection string gives the Endpoint and the Authentication method.
The Endpoint is easy, its just the URL of your namespace which will be <yourNamespaceName>.servicebus.windows.net
The Authentication method can be Shared Access Tokens, or Managed Identity. We can use the default shared access token that comes with Service Bus right now.
On the left menu for the Service Bus namespace choose the Shared access policies option. That will show you the list of existing policies that are set up on your Service Bus.
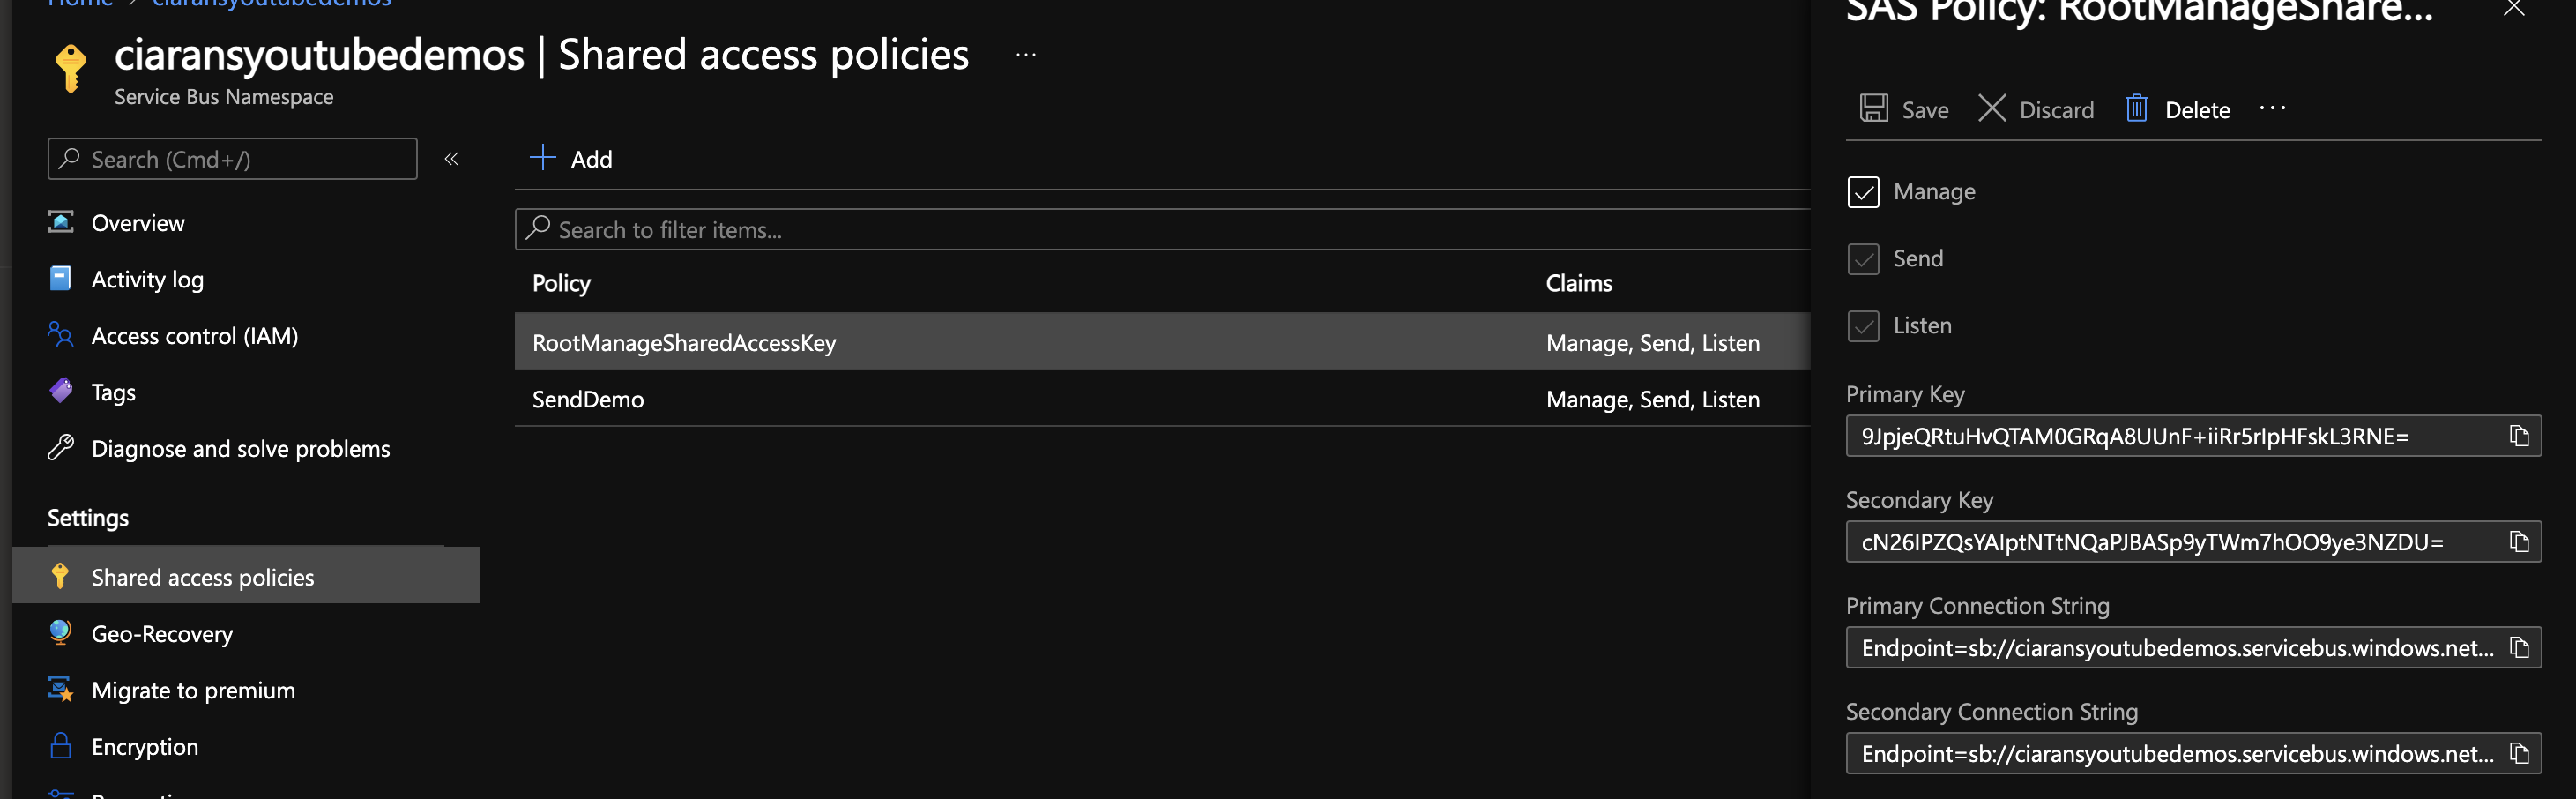
There will be a default policy there: RootManageSharedAccessKey.
Click that will give you a flyout where you can copy the Connection String from. This connection string is what you pass to the Service Bus client components.
More Information
I’ve been creating a series of videos on building message driven systems and Azure Service Bus. Check it out here: Building Message Driven Systems Playlist
The source code for the examples in that series can be found in this Github repository https://github.com/ciaranodonnell/AzureDemos/tree/master/AzureServiceBus/
Comments